|
Quick Start |
|||||
|
|||||
|
Steps |
|||||
|
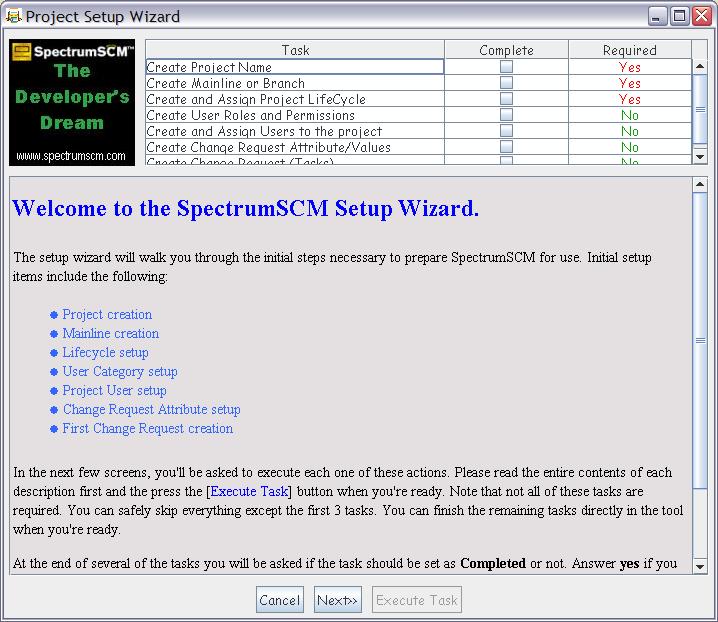
1. The first time you access SpectrumSCM, the system will detect that no projects actually exist yet, and will automatically start the project configuration wizard. The user will be guided through a series of screens that, when finished, will leave the system is a state where it is immediately ready for use. |
|||||
|
|||||
|
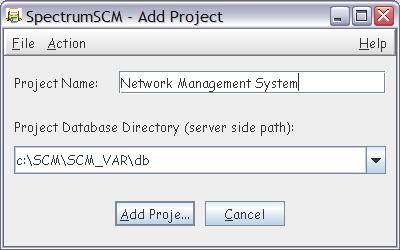
2. The first screen is the Project Creation Screen. Enter the name for the project, and click Add Project. |
|||||
|
|||||
|
3. You will be notified that the project was added correctly. |
|||||
|
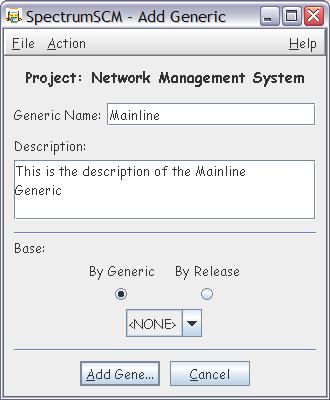
4. Enter the generic name and a small (optional) description. A Generic may be considered a baseline for the project and is a special form of branching. |
|||||
|
|||||
|
5. You will be notified that the generic for this project was added correctly. |
|||||
|
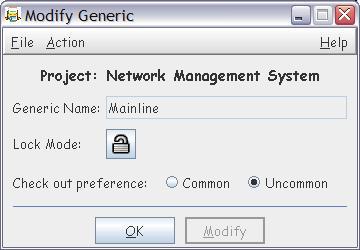
6. The default mode (Unlocked) should be selected, since there are no prior generics available. |
|||||
|
|||||
|
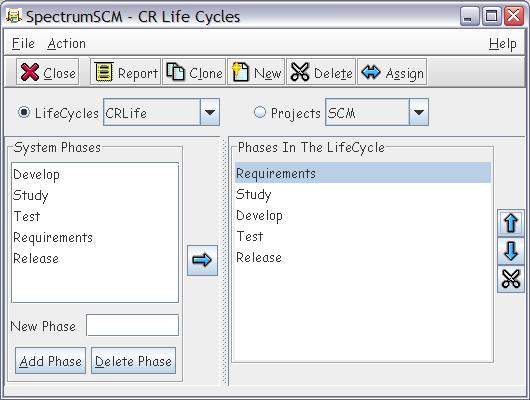
7. The Change Request Life Cycles screen allows you to assign a life cycle to a project. |
|||||
|
|||||
|
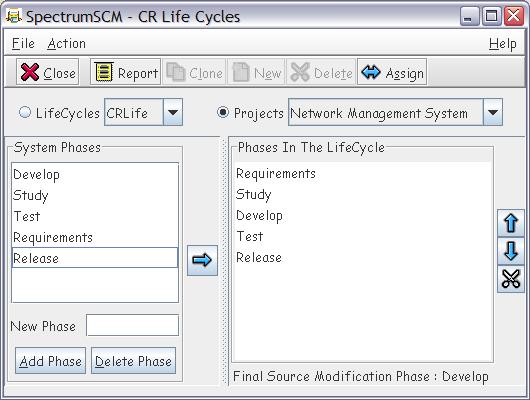
8. Click the Projects radio button, then click Assign. | |||||
|
|||||
|
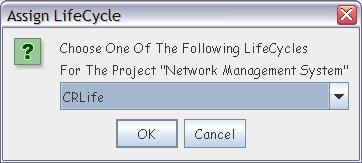
9. Select the desired life-cycle then click OK button. |
|||||
|
|||||
|
10. Select the last development phase then click OK button. |
|||||

|
|||||
|
11. You will be notified that the Life-Cycle was assigned correctly. |
|||||
|
12. Click on the Close button to return to the main screen. |
|||||
|
|
|||||
|
13. At this point, you are ready to use the tool. |
|||||
|
|
|||||
|
|||||