| Create CR Attributes | |||||
|
|||||
|
Steps |
|||||
|
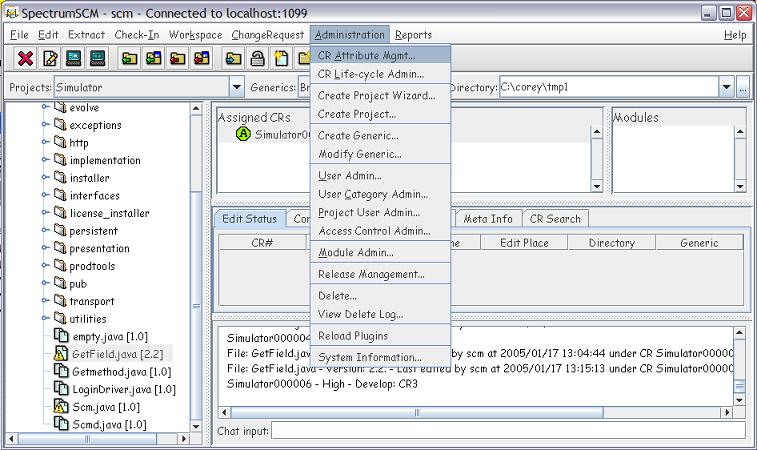
1. A Change Request is an issue to be recorded and tracked in a project. To create change request attributes, click on Administration->CR Attribute Mgmt... The CR attribute management screen also allows you to assign a CR numbering format for the project. |
|||||
|
|||||
|
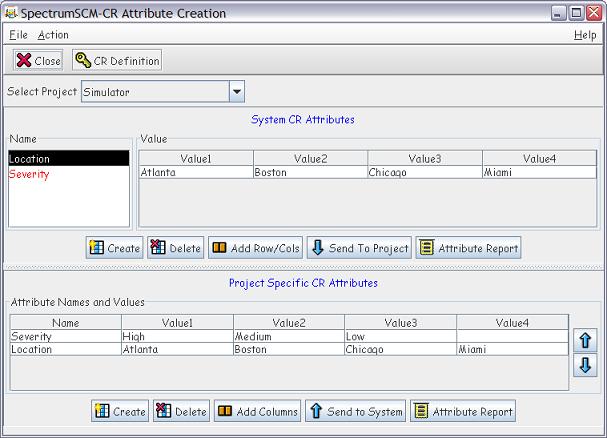
2. The top panel displays the system wide attributes and the bottom panel, the attributes assigned to the selected project. To create an attribute select the Create button. If you want this attribute to be project specific, then select the project side create button. Otherwise select the system side button. |
|||||
|
|||||
|
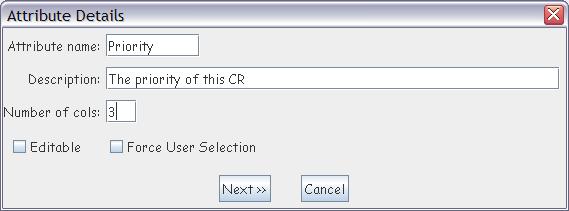
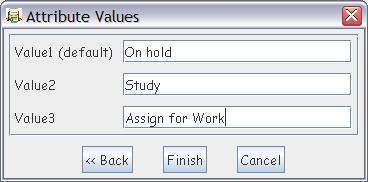
3. A panel is presented requesting the attribute name, a brief description and the number of values for the attribute. If you want this attribute to be editable then check the Editable option. An editable attribute provides the ability for entering free-form text for the attribute value. Once this is done, a second panel is presented so that each of the attribute values can be entered. |
|||||
|
|||||
|
4. If the attributes were created at the system level then they can be assigned to a project simply by selecting the appropriate attribute name and value set, and then selecting the Send To Project button. |
|||||
|
5. An attribute can be deleted by selecting it and the appropriate Delete button. Values can be added to an attribute value set by selecting it and the Add Row/Cols or Add Cols button. |
|||||
|
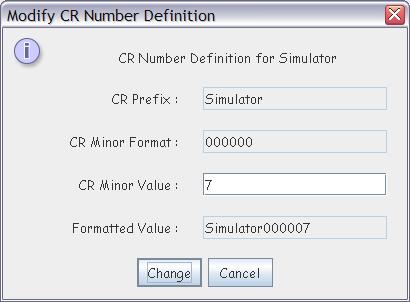
6. The Change Request numbering is made up of a string followed by a number. By default this is the project name and a 6 digit number. This can be changed by selecting the Key icon on the toolbar. Using this facility you can select any string prefix to be followed by some number format. The CR number format has to be assigned before Change Requests are created in the project. |
|||||
|
|||||
|
|
|||||
|
|||||