|
Branching files |
|||||
|
|||||
|
Steps |
|||||
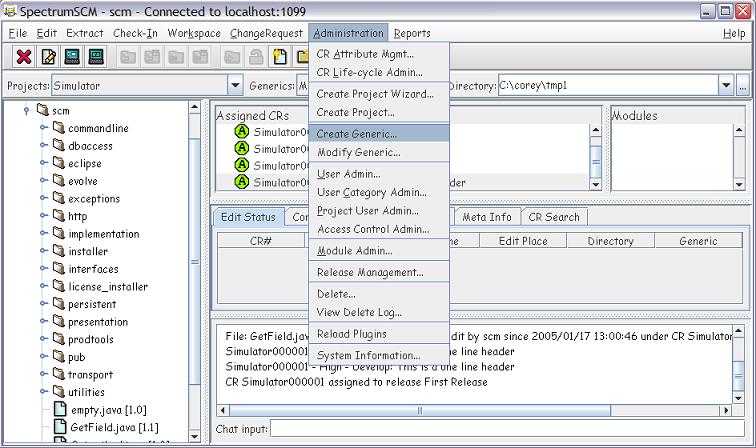
| 1. Select the Create Generic... item from the Administration menu. This will bring up the Add Generic screen. | |||||

|
|||||
|
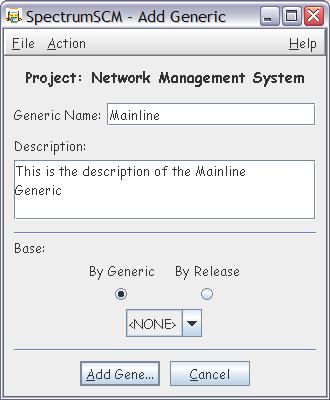
2. Enter a name for the new branch and a short description of what the branch will be used for. Then select whether the branch should be created off of another branch, from a previous release or whether the branch should have no root at all. Creating a branch from another branch will base the new branch on the last release of the base branch (this will lock the last release in the base branch). All files in the new branch will be common with the base branch. Creating a branch from a previous release will base the new branch in the specified release and will uncommon all files that have changed since the base release was formed. This guarantees that all the files in the new branch will match the file versions of the files in the base release. Use this branch creation method when you want to extend a previously created release. Creating a branch with no root creates a branch with no active files. The branch will remain empty until new files are physically added to the branch. Files added to an unrooted branch cannot be re-commoned with another branch, but they can be merged with the same file in any other generic. |
|||||

|
|||||
|
3. When creating a new branch from a previous branch, you will be presented with the following popup: |
|||||

|
|||||
|
Selecting the Yes option will create the new generic and lock the last release in the base generic. The last release is locked because the locked release is actually the base of the new generic. A release on a generic in SpectrumSCM is dependent on the previous release on that same generic, and is not simply a label that spans the entire file structure in the repository. Thus, the release must be locked to ensure that new releases created on the new generic will be immutable. |
|||||
|
4. When creating a generic with no base, you will be presented with the following popup: |
|||||

|
|||||
|
Select Yes to create the new generic. |
|||||
|
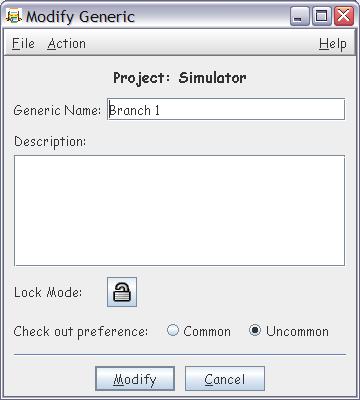
5. After the new generic has been created, the Generic Modification screen will automatically be presented. On this screen the user can choose to lock the generic and can set the file check-out preferences. |
|||||
|
Locking the generic forces all file check-outs on common files to uncommon the file on this generic. This option is best used when a generic has been created against a previous release, as this guarantees that the files on the generic will always match the files in the base release. Setting the check-out preference radio buttons sets the default action for the check out icons on the main screen: |
|||||

|
|||||
|
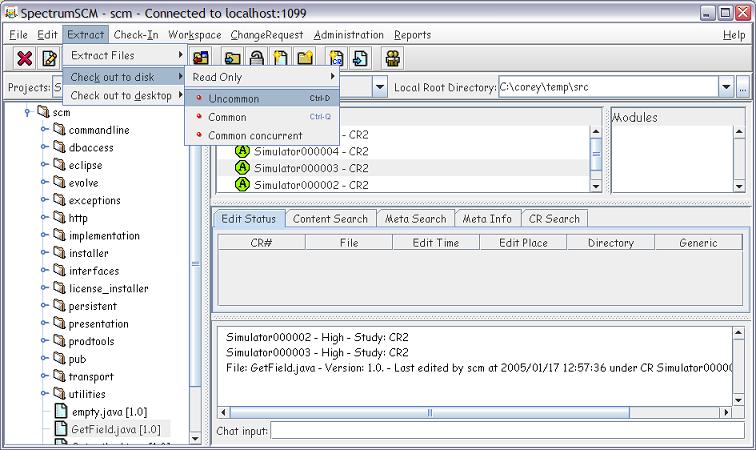
5.When a new generic is rooted in another generic, all of the files on the base generic are common with the new generic. This means that only one physical instance of each file actually exists. To physically diverge the files on either generic, the files must be checked out uncommon. This can be controlled from the Modify Generic screen (as described in step 4) or can be directly controlled from the extract menu on the main screen: |
|||||

|
|||||
|
|
|||||
|
|||||